I imagine that any citrus and aromatic tea - not ordinary black tea, though, the tannins could be too much for most citrus - would work quite well. If summer continues in a similar fashion expect further experimentation.

As Mike has claimed that anybody can make a cake and as Lemon Madeira Cake appears to be one of the most popular recipes on the website, we decided it was time to hand it over to our newest columnist to see what he would make of it (literally).
Some say that he thinks that Madeira cake is actually made from the Island of Madeira itself and that all the cakes in world are hand made by Mr. Kipling. All we know is that he is A Bloke...
Lemon Madeira Cake
After being handed the recipe, the first challenge was to locate the kitchen. This was easy as I knew it was the place that contained the microwave which is used to reheat the remains of the previous night’s take away. With that done, the next logical step was to check the ingredients on the list. A trawl through the kitchen cupboards revealed not only kitchen equipment I had no idea that I possessed (anybody else own a penguin shaped ice cream scoop?) but that I was short of one fresh lemon and butter, with all the other ingredients being present as a result of living with my girlfriend who is rather good at this baking and cooking malarkey. I did toy briefly with the idea of substituting the lemon juice for beer which was in the fridge and ignoring the whole lemon zest thing but as I needed some butter and the cake was called Lemon Madeira Cake and not Beer Madeira Cake, a trip to the shops was in order.
After locating butter and spread section at my local generic supermarket, I started to release that the whole baking a cake thing was not going to be, well, a piece of cake as I was presented with a wide selection of butters and margarines. Ruling out margarine as an option because the recipe stated butter, it still left me with the choice of unsalted or salted butter. With no guidance on the packaging about which was the most suitable for the cake I was making (perhaps something butter manufactures may consider doing in the future for us novice chefs?), and not wanting to look like a plonker by asking my fellow shoppers which butter I should be using, I had to resort to using my brains to think my way through this tricky dilemma. This was not an easy thing as everybody knows that a bloke only thinks about three things; beer, sport and girls so the additional thinking about cooking was going to involve serious mental exertion and possibly a complete rewiring of the neural pathways in my brain.
I knew three things about salt; it tasted good on chips, it is an awesome flavouring for crisps and that it was used in the past as a food preservative. On that basis then salted butter looked like a winner, but Lemon Madeira Cake is neither chips nor crisps and it was not intended to preserve it until the end of time (although that did appeal to me as a way of leaving my mark on the world). My internal debate was finally settled not on my non-existent knowledge of cooking but on the fact that the recipe was called Lemon Madeira Cake and not Salted Lemon Madeira Cake and thus unsalted butter was the victor. Besides, salt was not in the ingredients list and if its name ain’t on the list, it ain’t going in my cake.
With the butter dilemma out of the way, the lemons were quickly found. I was relieved to find that unlike the butter there was no options to make regarding the salt content of said fruit so I picked one that conformed to my idea of a lemon, (i.e. yellow all over and oval in shape) and made my way home via the checkouts to continue making my cake reasonably confident that I had made the right ingredient choices.
Once back home, with all the ingredients laid out before me and a nice cup of tea in hand, I was now ready to assemble the cake. It was at this point that I encountered my second dilemma. The opening instructions were to cream the sugar and butter until light and fluffy and this gave me two things to debate.
Firstly, what was meant by cream as the ingredients didn’t state the need for cream or for milk. Was it an oversight by the recipe by missing off a vital ingredient? Being a rugby fan and ex-player, the phrase ‘he got creamed in the tackle’ was often used but I could not see how taking the butter and sugar outside and onto a rugby field to repeatedly jump up and down on them until they submit would help get this cake made. Besides, how would I get the grass and dirt out of the mixture?
My brain was also telling me that adding milk to the recipe seemed to be wrong and this would probably result in a sugary-buttery milky mess that would taste awful. Also milk or cream wasn’t in the ingredient list so the same rule applied to the milk as had applied to the salted butter, so it wasn’t going in my cake.
Luckily for me my new embryonic cooking neurons (Discovered at the local generic supermarket) came up with the idea that perhaps cream in this case actually meant mixing. This appeared to make sense as at some point everything would need mixing together so why not start at the beginning? With cream = mix sorted, the second issue with the instruction now needed to be tackled.
Being an Engineer by trade who often has to mix noxious chemicals together, I’m use to such instructions as mix for 10 mins until a viscosity of 10 centistokes has been reached. As such, mix until light and fluffy was a new concept. My engineering brain therefore required a reference for light and fluffy. Candyfloss would seem to be the ideal light and fluffy food reference but with no candyfloss in the house and with no Travelling Fair in town to get some, I had to settle on clouds. Thus the first instruction changed from cream until light and fluffy to mix until cloud like. With that sorted, the butter and sugar were weighed into a bowl and the first of two mistakes raised their ugly head.
The first, although I did not know it at the time was the wrong choice of mixing implement. The second was that I had neglected part of the recipe. With the ingredients ready to mix, I chose a whisk to do the hard work based solely upon the thought that that the whisk is what every self respecting cake chef would be using. With whisk in hand I started to mix but I noticed that all wasn’t well. Depending on where I started, the whisk either moved the lump of butter around the bowl or just flicked sugar the sugar about leaving me with a sugar coated butter stick. This was not the cloud like mixture I was aiming for and resembled more of a mouldy yellow brick – light and fluffy it certainly was not.
In an effort to work out where I had gone wrong, I consulted the recipe instructions and noted the word ‘softened’ in front of butter in the ingredients list. It was at this point I released that I had veered off the recipe as I had been using the butter straight out of the packet with no softening involved what so ever. Confident that this was the case, I turned to the only piece of kitchen equipment I knew how to competently operate, the microwave.
Ensuring that the microwave was clean from any previous reheating explosion tragedies, the bowl and mix was placed into it and all that was left was for the timer to be set. Knowing that the recipe said softened and not melted, a short heating time would be the order of the day. With the fear of making a molten sugar butter drink, a heating time of 30 seconds was chosen on the basis that if the butter wasn’t soft enough, I could whack it back into the microwave to reheat. In the end, 30s proved to be a good choice as when the mixture was removed from the microwave, the butter was just about to turn into a liquid.
With my soften butter and sugar, I picked back up my whisk and started to mix the two ingredients together and low and behold, a fluffy mix started to appear before my eyes. This wasn’t without incident however as the choice of using a whisk was now appearing to be a bad one. Although mixing was going well, he problem I was encountering was that the soften butter and sugar mix was disappearing through the gaps of the whisk and being held there. At one point, the whole mixture was contained within the whisks metal bars like it had been sent to cake prison for assault against human taste buds. This I felt was unfair as my cake should be at least completed and tasted before being praised or condemned.
I broke my mix out of jail by use of a knife being poked through the bars to prod it back into the bowl. Once free, the whisk was removed from mixing duties and replaced with what I believe is an old kitchen favourite – the wooden spoon. With the substitute implement in use, and while cursing the recipe under my breath for not stating ‘Use a wooden spoon’, mixing proved to be a lot easier and after 5 mins of mixing, the state of light and fluffy and cloud like was achieved. I should point out that the term light and fluffy appears to be artistic license on the part of the recipe as in my opinion the final mix resembled mashed potatoes.
The next part of adding the lemon zest proved to be the easiest part of the recipe after I had looked up what zest actually meant (Courtesy of the Tinterweb – Zest = the outside bit of a lemon). The only concern at this point was that the amount of zest required wasn’t stated so I zested (if there is such a word) the whole lemon using a cheese grater and dumped the gratings on top of the wannabe mash potato mix. The zest grating did lead to a brief internal debate about which size holes to grate with and thus utilising my new found cooking thinking neurons, the smallest holes were chosen. The thinking behind this was that I have never seen people walking down the street tucking into a big bag lemon peel or ordering it in a cafe as a taste alternative to a bacon butty, so therefore having big chunks of lemon skin in my cake was probably a big no no.
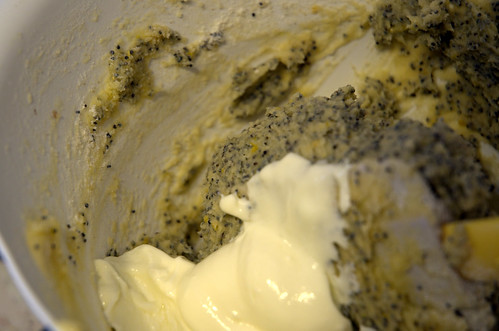
With the zest added and sitting on top of the mix, things didn’t look quite right as it now looked like I had mashed potato with yellow dandruff. Even though the recipe didn’t state it, my engineering skills kicked in and I picked up my now trusty wooden spoon and mixed the zest in for a couple of minutes to get an even distribution of lemon peel throughout the mix. Once I was happy with my zesting, it was time to add the eggs and flour.
Not knowing if the flour to be added with the eggs was part of the 210g stated in the ingredients list, I decided that it was as I didn’t want to deviate from the Ingredient lists. With the flour weighed out in a separate bowl, it was time to get the eggs from the fridge. Cracking open the eggs would be a new experience for me so taking one delicately in my hand, I gently tapped the outside of the egg against the mixing bowl. A few attempts like this failed to yield a cracked egg so I decided to use a bit more force.
As it turned out, I used a bit too much force as the first egg smashed in my hand resulting in a nice sticky mess running down the side of the bowl. Luckily, I managed not to get any shell in the bowl as anybody who has experienced eggshell in a fried egg butty from a greasy burger van outside a football ground knows; the shell severely affects taste by making you think that you have inadvertently eaten wall plaster.
After cleaning up the resulting mess, the fridge was inspected again and lurking at the back was a spare egg for me to use. Modulating my egg bashing strength, the next egg was successfully cracked and added to the bowl. As per instructions, a tablespoon of flour was added straight afterwards and again my trusty wooden spoon was called upon to mix the ingredients together. After each addition of egg and flour, the mixture started to change colour and saw an increase in mix viscosity. This didn’t pose a problem as I managed to utilise my egg smashing skills to continue mixing but things started to look a bit iffy.
As the rest of the flour was added, the mixture started to become lumpy with the same consistency of wallpaper paste as the flour started to clump together. Vigorous mixing with the trusty wooden spoon failed to rectify the problem. In fact I found the only way for the wooden spoon to get through the lumps was to smash the spoon over their heads. However this had the unwanted side effect of covering the kitchen walls with mix and not wanting to add the chore of cleaning kitchen walls to the washing up of all the cooking implements I was using, another mixing tool was required.
While pondering the issue, I glanced over to the sink and saw the discarded whisk waiting to be cleaned. Buoyed by previous successes, the new and developing cooking neurons contained within my bonce flared into life. They suggested that the whisk wires that previously entrapped my mix may now be the thing to destroy the lumps plaguing it. With the wooden spoon retired for the day, the whisk (after cleaning) was given an opportunity to redeem itself.
In a comeback worthy of England against Australia at the Headingley cricket test in 1982 and with me cursing the recipe again for not stating ‘use a whisk’, the floury lumps that had called my mix home were disintegrating in the onslaught of the whisk. 5 mins of whisk mixing resulted in a smooth, lump free mix that was not trapped between the whisks wires (WOOHOO!) and was now ready to have the lemon juice added.
After taking the zested lemon and cutting it in half with a big knife, a method of removing the juice from the lemon was required. After briefly considering using my egg smashing strength to squeeze the life out of each half, I remembered that my initial scouting of the kitchen for ingredients had revealed the presence of a lemon juicer and so I decided that to appear to be as chef like as possible, the juicer should be used rather than brute strength. Once all the juice had been extracted from the lemon, it was added to the other ingredients.
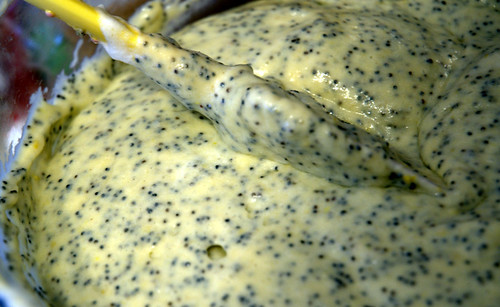
Again, the recipe instructions didn’t state the need to mix the juice into the other ingredients but as it now resembled a bowl used to catch drips from a leaking ceiling, my engineering instincts told me to mix it all together. This now gave me an interesting choice to make. The wooden spoon had proved useful when mixing the soften butter and sugar together but failed with the flour. The whisk had proved useful with the flour but useless with the butter and sugar so which one to use now to mix the juice into the mixture? The solution to this was simple as the whisk was chosen on the basis that the wooden spoon was already in the washing up water and would therefore need drying before use. A couple of minutes mixing lead to the juice being well mixed in and ready to face the oven. It also lead to my final problem of the day.
The recipe called for a 450g loaf tin. This initially didn’t cause a problem as I knew from making crisp sandwiches that a loaf is rectangular in nature and therefore a loaf tin should presumably be rectangular as well. Having found the tins I required lurking at the bottom of the cupboard, the problem I encountered was that the tins were not labelled with their weight as I expected. A quick guestimate of comparing the size of the mix against the size of the tin narrowed the choice down to two likely candidates. Not wanting to have a tin that was inadequate for the job in hand, I once again called upon my engineering skills to resolve the issue.
Taking each tin in turn, they were placed upon the weighting scales, tared and filled with water as I knew that (ignoring temperature and pressure and impurities within the water) 1ml of water = 1g, thus the weight of the water in the tin would reveal the tin to use. And so it proved to be the case as one tin proved to be right one for me.
Once dried, the tin was prepared for use. Using the last of the butter, the tin was greased to within an inch of its life before being filled with the cake mix. Again, it appears the recipe instructions use artistic license by describing the filling mechanism as pouring as in reality the mix has to be scooped out and scraped into the tin but this does make a satisfying splatting noise as it hits the tin, bringing back fond memories of making mud pies to throw at my sister in the back garden as a child.
With the mixture in the tin, the oven was successfully lit with only few singed hairs on the back of my hand and set to the required temperature. Unlike frozen pizzas, the recipe didn’t state whereabouts the tin should be placed within the oven so I chose to place it on the middle shelf just like I would with my favourite meat feast pizza. With an hour to kill until it was cooked, I glanced over at the washing up and decided to go and prod some serious buttock on my favourite console game and tackle the dirty pots much, much later.
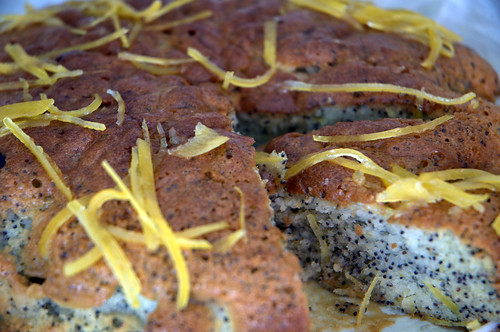
After one hour and a new high score, the cake was removed from the oven. The mixture had risen, had turned a golden yellowy colour and a split down the back just like the Pennines split the back of the country. Forgoing the skewer test on the basis that it would have added to the washing up, the cake was left to cool before being removed from the tin by holding it upside down and bashing the bottom until it came free. Luckily the cake didn’t fall all the way out and onto the floor and so it was eased onto a plate. A brief taste test by me did indeed confirm that I had produce an edible cake and so it was left for the nice ladies of Tea and Cake to pass their final judgements as I wandered off for a beer safe in the knowledge that my skills wouldn’t yet be required on Master Chef but strangely looking forward to my next challenge, hoping that the next one will have better defined instructions than this one.
Lemon Madeira Cake Recipe
| Ingredients: | ||
| 240g softened butter (i.e. an entire pack, once you have greased your tin) | ||
| 200g caster sugar | ||
| Grated zest and juice of one lemon | ||
| 3 large eggs | ||
| 210g self raising flour | ||
| 90g plain flour | ||
| | | |
| Based on a Nigella Lawson recipe | | Based on Blokes Experience |
| | | |
| Equipement: | | Equipement: |
| 450g loaf tin, buttered and lined | | 450g loaf tin, buttered and lined |
| Oven at 170 degrees c / gas mark 5. | | Oven at 170 degrees c / gas mark 5. |
| | | Whisk |
| | | Wooden Spoon |
| | | Lemon Juicer |
| | | Weighing Scales |
| | | |
| Instructions: | | Instructions: |
| Cream the butter and sugar until light and fluffy. | | Soften the butter in the Microwave for 30s before using a wooden spoon to mix the butter and sugar together until it resembles Mash Potato |
| Add the lemon zest. | | Use the small holes on a cheese grater to grate the whole of the outside of the lemon, add to the mix and mix in. |
| Add the eggs one at a time with a tablespoon of flour for each. | | Add the eggs one at a time with a tablespoon of the 210g of self raising flour for each egg |
| Next gently mix in the rest of the flour. | | Mix in the rest of the self raising flour and plain flour using a whisk |
| Finally, add the lemon juice. | | Use the lemon juicer to juice the lemon, add to bowl and mix |
| Pour the cake mixture into the prepared loaf tin | | Grease loaf tin using remains of the butter before scooping out mix from the bowl and into the tin |
| Sprinkle the top with caster sugar | | Sprinkle the top with caster sugar |
| Bake for one hour (a metal skewer inserted into the cake should come out clean when the cake is done). | | Bake for one hour on middle shelf of oven |
| Let the cake cool in the tin before you try to move it. | | Remove from oven and let it cool before removing from tin |
| | | Eat |


